Pages

Friday, December 30, 2011

The Witch Tower - Review

Hi everybody,

I hope you had a great Xmas time or whatever you go for at that time of the year!

I shamelessly enjoyed a week off so I decided to finish the Witch Tower. Overall it is great kit: very easy to assemble (roughly an hour if you clean up) and few gaps (honestly all of them could go for natural weakness of the building because they appear in between bricks).

So big fatty full of paints thumbs up GW!

They are few down sides which are not negative for all of us btw. There is an insane amount of details and hidden bits. I took me over 20 hours for the paint job, but half of it was because of a begginer mistake I will develop later on. I have to admit few of them are ill placed inside the building. Some are hard to reach once assembled (inside of the wooden windows and the chaos gateways if you want to give them the attention they would deserve). I reckon mine would need 2 extra hour for polishing details ( some highlights on details such as book, sand timer, blood tracks) but I am satisfied as it is and i may get back on it in few month but for now I want to play with it!

So here is the overall result.
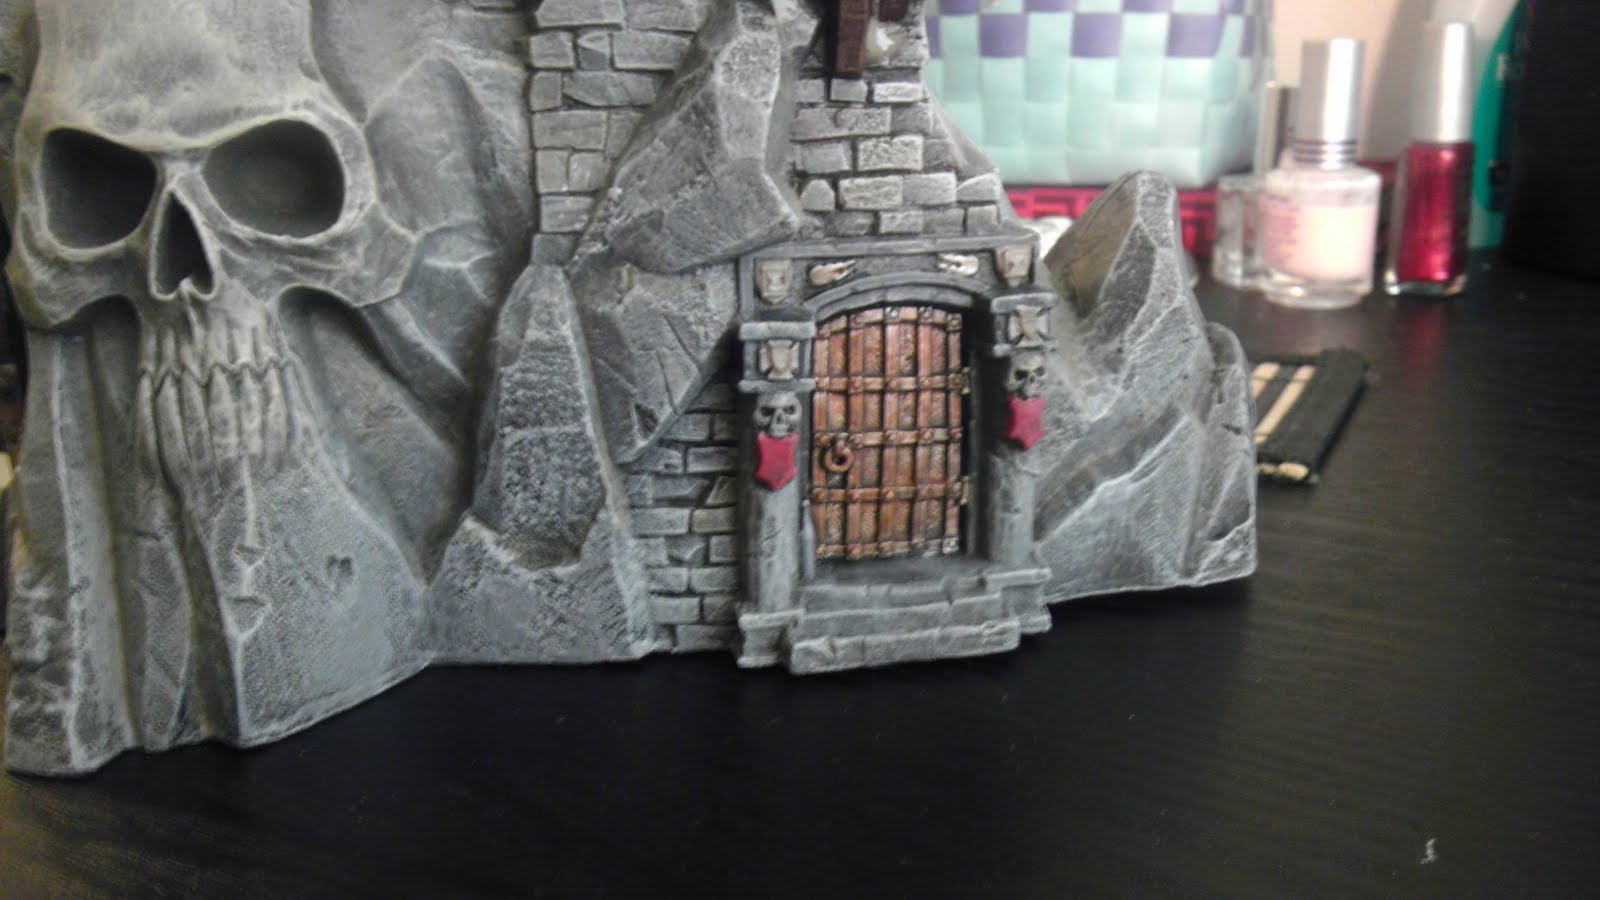
Some of you may notice the bottom floor bricks pattern seem snot to match.. well it is because it is not! I stupidly started to paint this one on its own mixing color and not taking not and i came back on the model 6 months later realizing what a m****n I can be!

So i started to paint all the bricks and just added some extra drybrushes on the bottom floor to blend it all together: I am half satisfied. Ideally you shall restart but ... yeah I have other stuff to paint as well! Contact me if you want the details about colors I used.

Her you can see floor by floor and you can appreciate GW effort to make this kit a little piece of awesomeness.

The main architectural oddity I found was the stone stairs at the second floor leaning on a half rotten wood floor... but hey there is a chaos gateway few inches away so what s really odd in there?

The top and bottom floor are astounding as a whole but my favorite details the two following one:
the pillars

and the winged death portrait: you have two of these available, i tried one in stone and one in metal.. metal is way nicer... I may change teh former one later on.


OK that all for today. Next Tamurkhan review and then I will start to bug you with my favorite army Tomb King.

Cheerios,

Da Roosta

Tuesday, December 27, 2011

Happy Holidays

Hope everyone had a great Christmas, ect. and hope that your New Years is the best yet.

If you havn't yet -check out www.belloflostsouls.com and the blinddwarf email to see some new vampires coming out January 14th.

Sunday, December 25, 2011

Da Mense Final

The Skullvane is done!

So in total it took a week of work: 2 evening assembling and 3.5 prep and painting.

I followed the White Dwarf of December article nearly to the letter. I am not big on weathered copper so I went for an ageing gold for the observatory dome.


I do really encourage anybody that invest in this building to get that White Dwarf. You will realize though that you can go a step further to enrich color here and there but the techniques and the logic are the same as the article explain you. I don't have airbrush so i used big flat cheap brush and i dry brushed with big rond shaped cheap brush. I found a lot of 24 brushes for 10 bucks at Michael's perfect for these purposes.

I added some red here and there. I added white stone for the statues and signs. I lighten the big skull to pop it out, bleach bone did the trick.


I used mix of delving mud and green wash to weather the building, kind of muddy juice leaking from the recesses and gutters. I added some wood glue sometime because the washes fluidity does not hold well against gravity sometimes, in that case I added black ink to compensate the glue. The glue dry translucent but still enlight the mix. I added also bird gifts.


Overall I pretty much enjoy the process. I find their kit so easy and plaisant to work with. I liked that so much that I started the witch tower right after but that is for another post. here's a preview.


Next post Tamurkhan review.

Until then take it easy plastic junkies.

Tuesday, December 20, 2011

Legions for Wed

Think a few of us are heading up for some games of fantasy and or to paint.

Thursday, December 15, 2011

Da Manse II

Hi Fella,

I was playing with idea to share my awesome experience with the manse with you guys: all in one block or step by step... Most likely will be something in between. Mostly because when i start painting I did not stop in between step to take picture at each step.

Let s start by the end the take home message:
1. liquid green stuff is awesome for building gap as it looks like mortar at the end.
2. Inks are amazing at creating an ambiance with your building. Honestly between dry brush and ink are all you need for this building.
3. Mickael's is your friend for cheap brushes and extra bits.

Ok so for today let s start with the assembling and the gap filling.


At the opening of the box I was pleasantly surprise with the cut and the sprue. Almost no cleaning and the guide is clear at a noticeable exception.... the ****ing side observatory...which by the way may be a tower if you so decide (I will do walls with them I said before).


So here was teh funny bit to do with very little gap to be fair and all of them filled quickly with liquid GS ...


AT the end I went for the observatory (I did not attached the done so I can place model over there) and I did but minor tweaks. The major one is that I shorten the wooden deck to position a portion of it at the facing door to allow positioning of single model in a neat spot.


DO NOT use the glue accelerator to build this. Because you need long strech of glue or big amount it tends to solidify in shape of worm or bubble due to surface tension by the time you press both parts and then you are screwed!

My only practical tip here is for the observatory tower:
you have 2 type (A & B)of walls and 4 walls in total. Assemble A+B using the octagonal base as platform to give you the right angle in between A and B, Do this twice and then only assemble teh two A+B blocks still using the octagonal base to stabilize when you press them against each other. Keep in mind that the deck must end close to a door (usually the most right side of the octagon)

Few numbers:

-4 hours in total
in details:30 min cleaning and cutting, 2 hours maing building, 1 hour obsrevatory an d30 min minor tweaks.

-1/4 of liquid Green Stuff


Cheerios Bambinos

Slan


I've been reading and watching as much as I can as of late on the Maya and Aztec civilizations and from one of the Maya glyphs this image stood out. :) Very cool to see where GW finds inspiration for their fluff. - Will see you guys Friday for the start of the Campaign -I"ll bring a camera for Army photos.

Looking good sir! - you may be a bit crazy considering you just got this saturday!

Hello

Met a few new Fantasy players last night - Hank, Ron and Mike so hopefully we'll be seeing more of them. Also I'd like to thank Ben for putting the word out about the blog- so thanks :)

Monday, December 12, 2011

Da Manse


I recently acquired the big fat Mense terrain from GW.

I assembled it last evening/night. I took pictures of the process. I will post them and a review on the kit by the end of the week...

But the kit is great.. besides the tower/observatory which is a bit hard to fit (took 2 hours). You have the option to build an observatory or a classic wing tower. I went for the observatory and I will use the four segments left from the tower to make fortified wall.

See you soon fellow Blindy

Albion Campaign Map


Looks like the campaign will be based in Albion :)

Best Painted - Matt's Beastmen

winners

Great Weekend

This past weekend we had the 1500pt Fantasy Battle bash! With 20 people showing up! A couple new faces also made an appearance - Jason from Philly with his Demons and another Jason with lizards. Nice to meet you guys. - If anyone took any picts of their battles please shoot me an email. josephmurban@gmail.com also I look forward to playing in the upcoming campaign. I signed on with my Lizardmen and Nick picked up a WoodElf army to change it up a bit.

On a side note anyone that is going to play in the campaign should talk to Duncan he said something about giving a discount on the mighty empire blisters to use for map markers.

Remember it's this Friday at 8pm to kick off the campaign have a General and 2 sub generals named for the event.

New Ogre Faq out.

Looks like Butchers and Slaughter Masters can indeed wear magic armor - Slaughter Masters can now take Great Weapons as well, goodbye Tyrant :(

Thursday, December 8, 2011

Shit I erased your post so sorry man!

Duncan offered to run a Badlands Campaign. He can keep things balanced. Let s talk it over at the tournament (that I will win). Come people come!

Wednesday, December 7, 2011

Campaign

There will be Ogres there already, and HE most likely... Go vamp!